At DIDWW we believe that by bringing together diverse ideas and projects that support open interconnectivity and standards, technology will become more powerful, usable and accessible.
For this reason, DIDWW offers our customers a way to boost their business productivity and make and receive phone calls without additional equipment by using phone.systems™, a fully featured virtual PBX platform.
What you need to get started:
- An account at DIDWW – register here.
- A DID number – how to buy a DID number video guide here.
- A phone.sytems™ plan - all pricing plans are available here.
Then follow these simple steps:
Step 1. From the “Trunks” option in the Management Portal, select “Voice IN” and click on “Add new”. Select the “phone.systems v2 Trunk” option from the dropdown menu (Fig. 1).
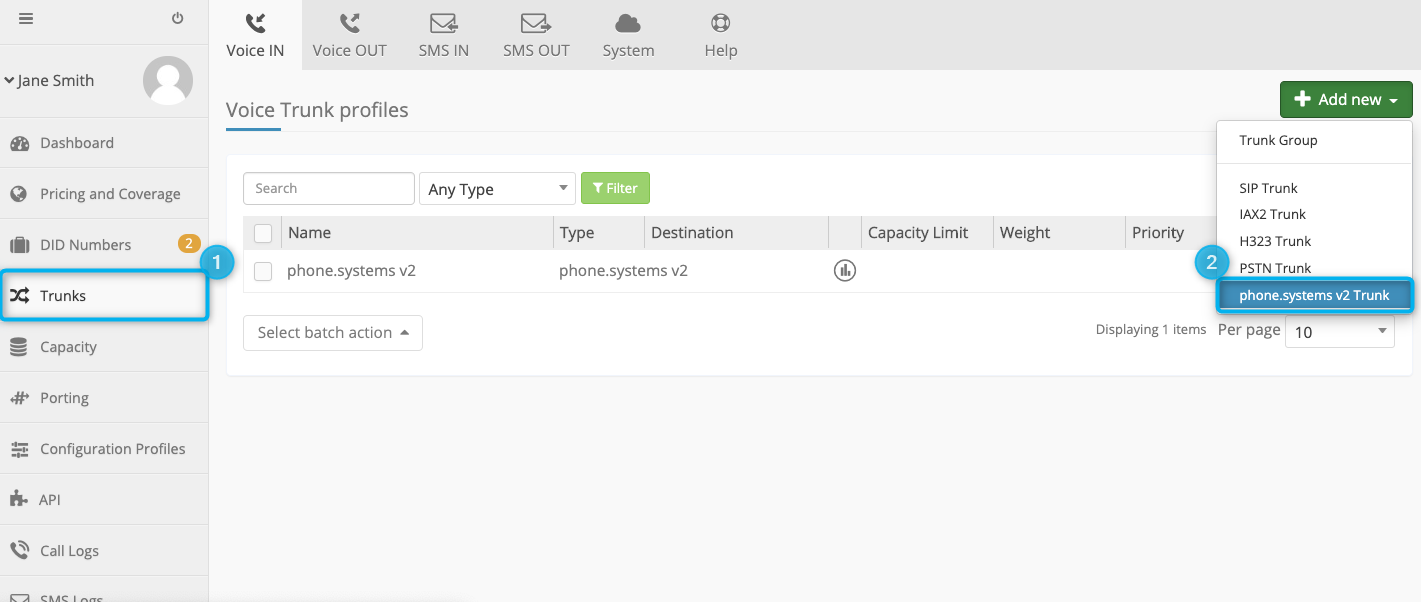 Fig. 1. Creating a new phone.systems™ trunk.
Step 2. You will be prompted to enter your “phone.systems v2 Trunk details” (Fig. 2). Basic configuration options are as follows:
- Friendly name - a trunk name to identify this service on your DIDWW user panel.
- Map all DID(s) - if checked, then all voice-enable DIDs in your account will be assigned to this inbound trunk.
Step 3. Click "Submit" to complete the trunk configuration (Fig.2).
 Fig. 2. Entering basic configuration information for a phone.systems™ trunk.
Step 4. Launch “phone.systems™” once you have selected your pricing plan (Fig.3).
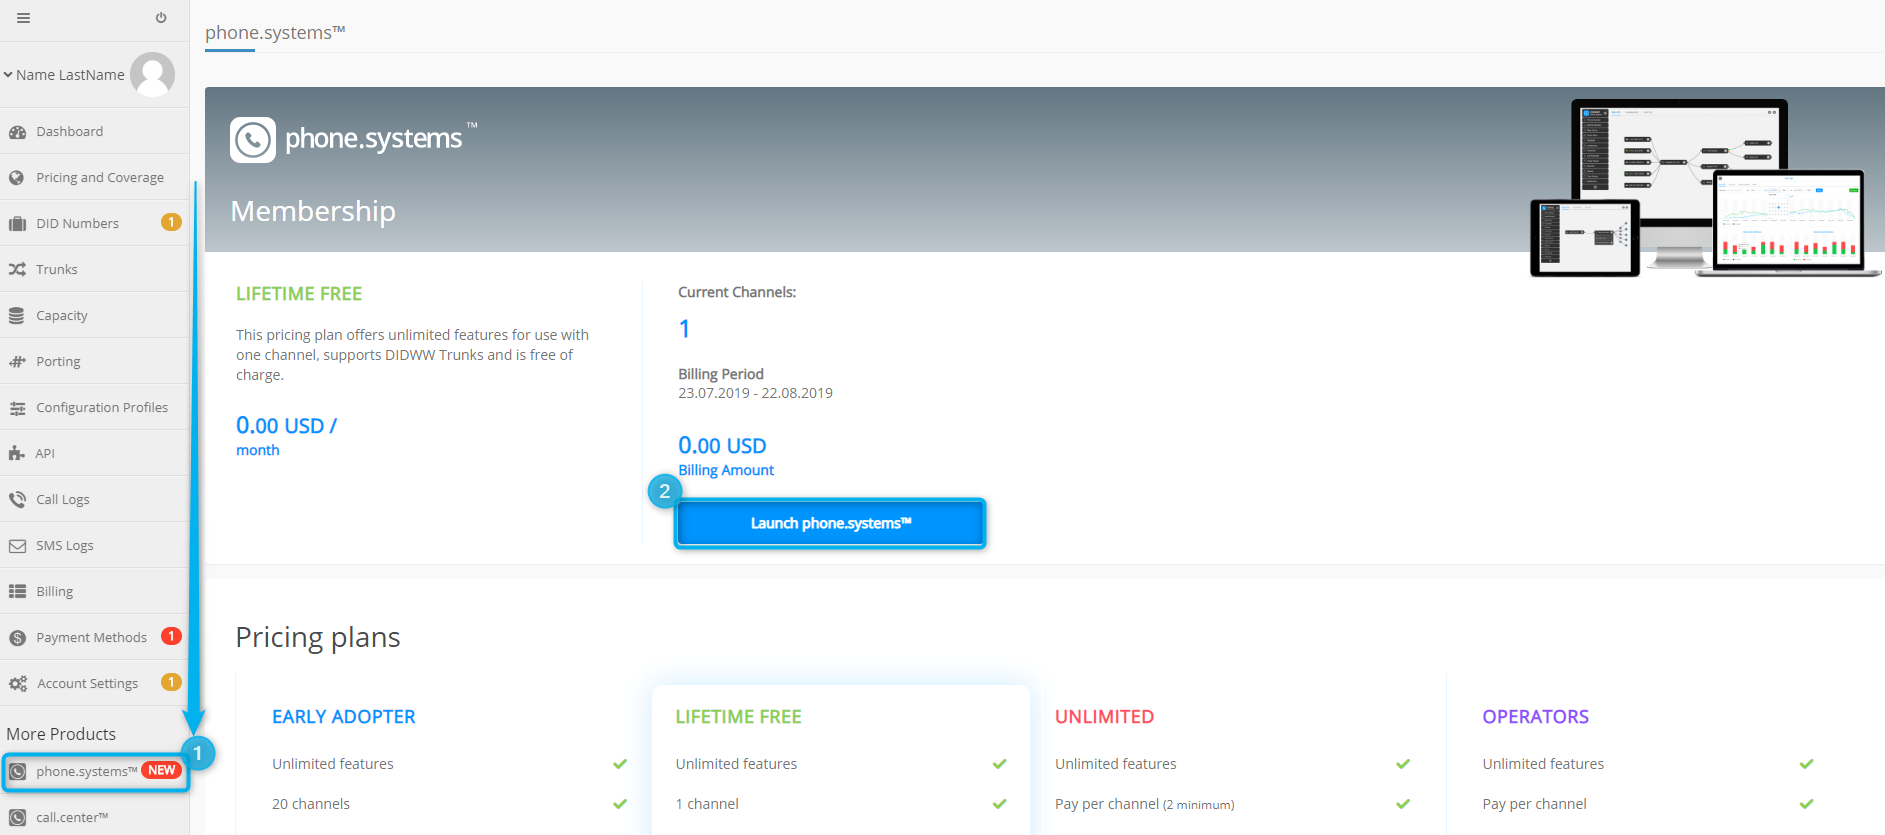 Fig. 3. Launching the phone.systems™ platform.
Step 5. On the phone.systems™ control panel, navigate to “Settings” and click on “Contact Center” (Fig.4).
 Fig. 4. Navigating through the phone.systems™ settings.
Step 6. Select “Create new Contact”. You will be prompted to enter your first and last name. Once this is done, click “Add a new Contact Method” (Fig.5).
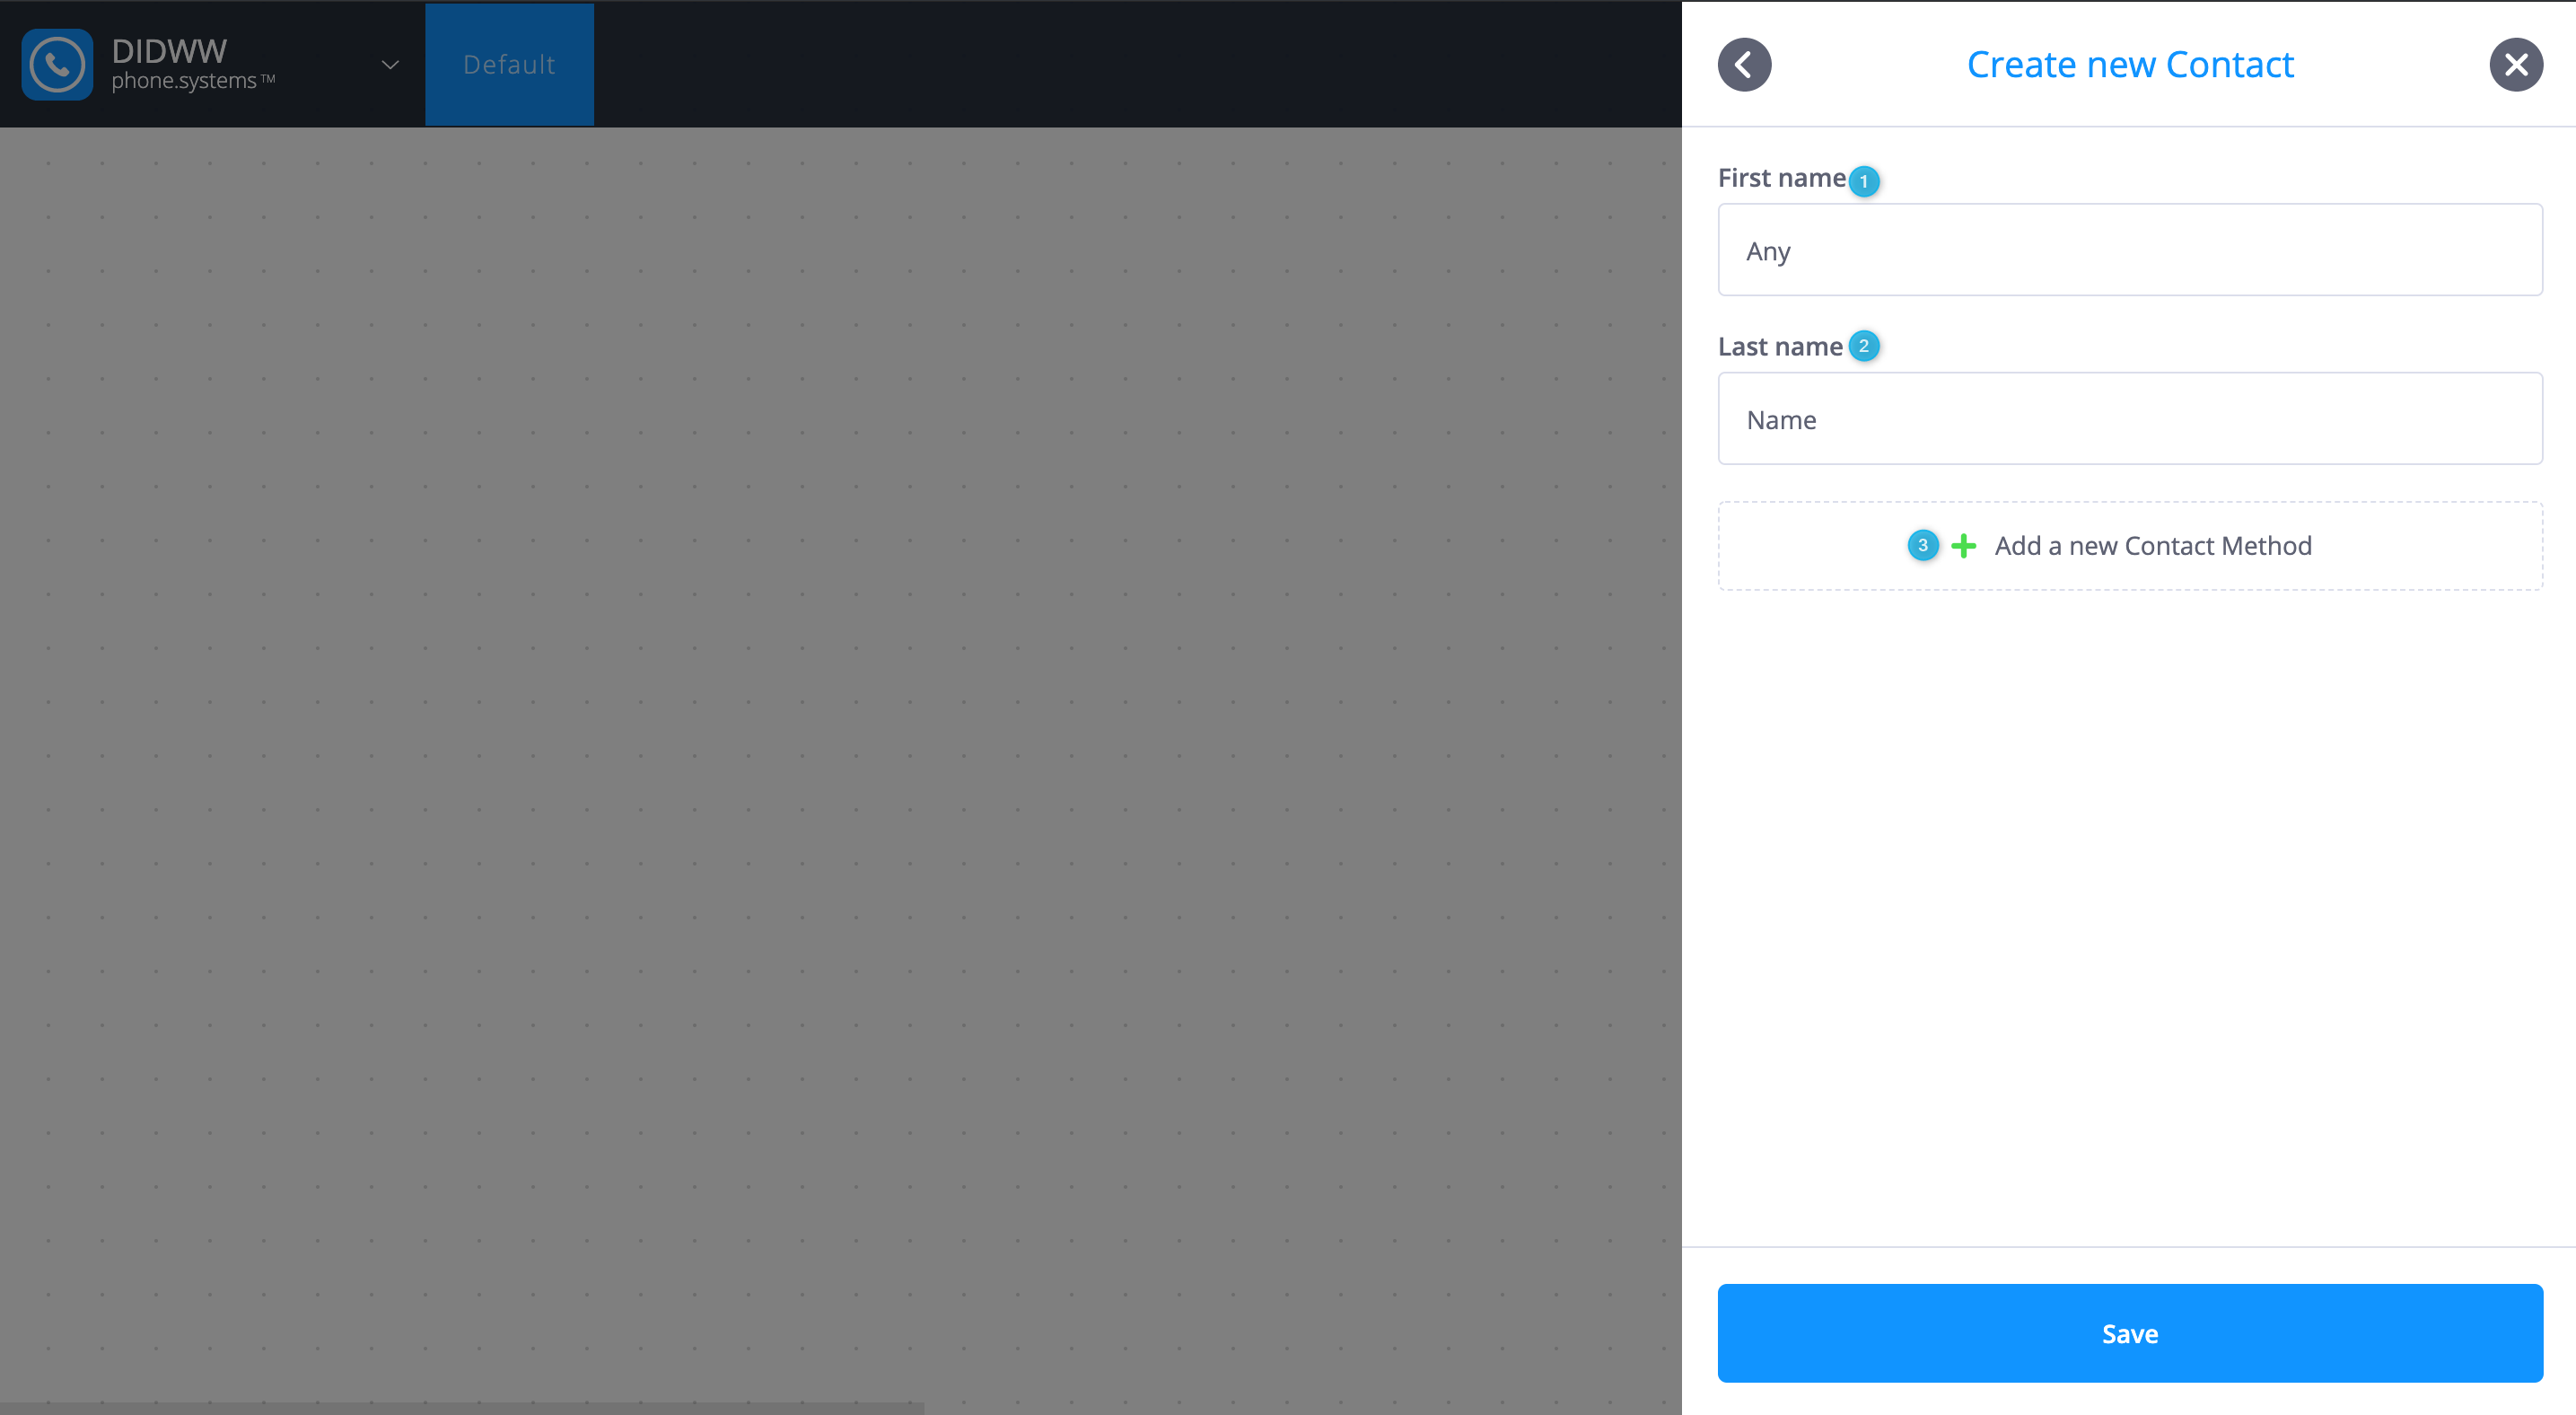 Fig 5. Creating a new Contact.
Step 7. From the contact method dropdown menu, select “SIP Account” (Fig.6).
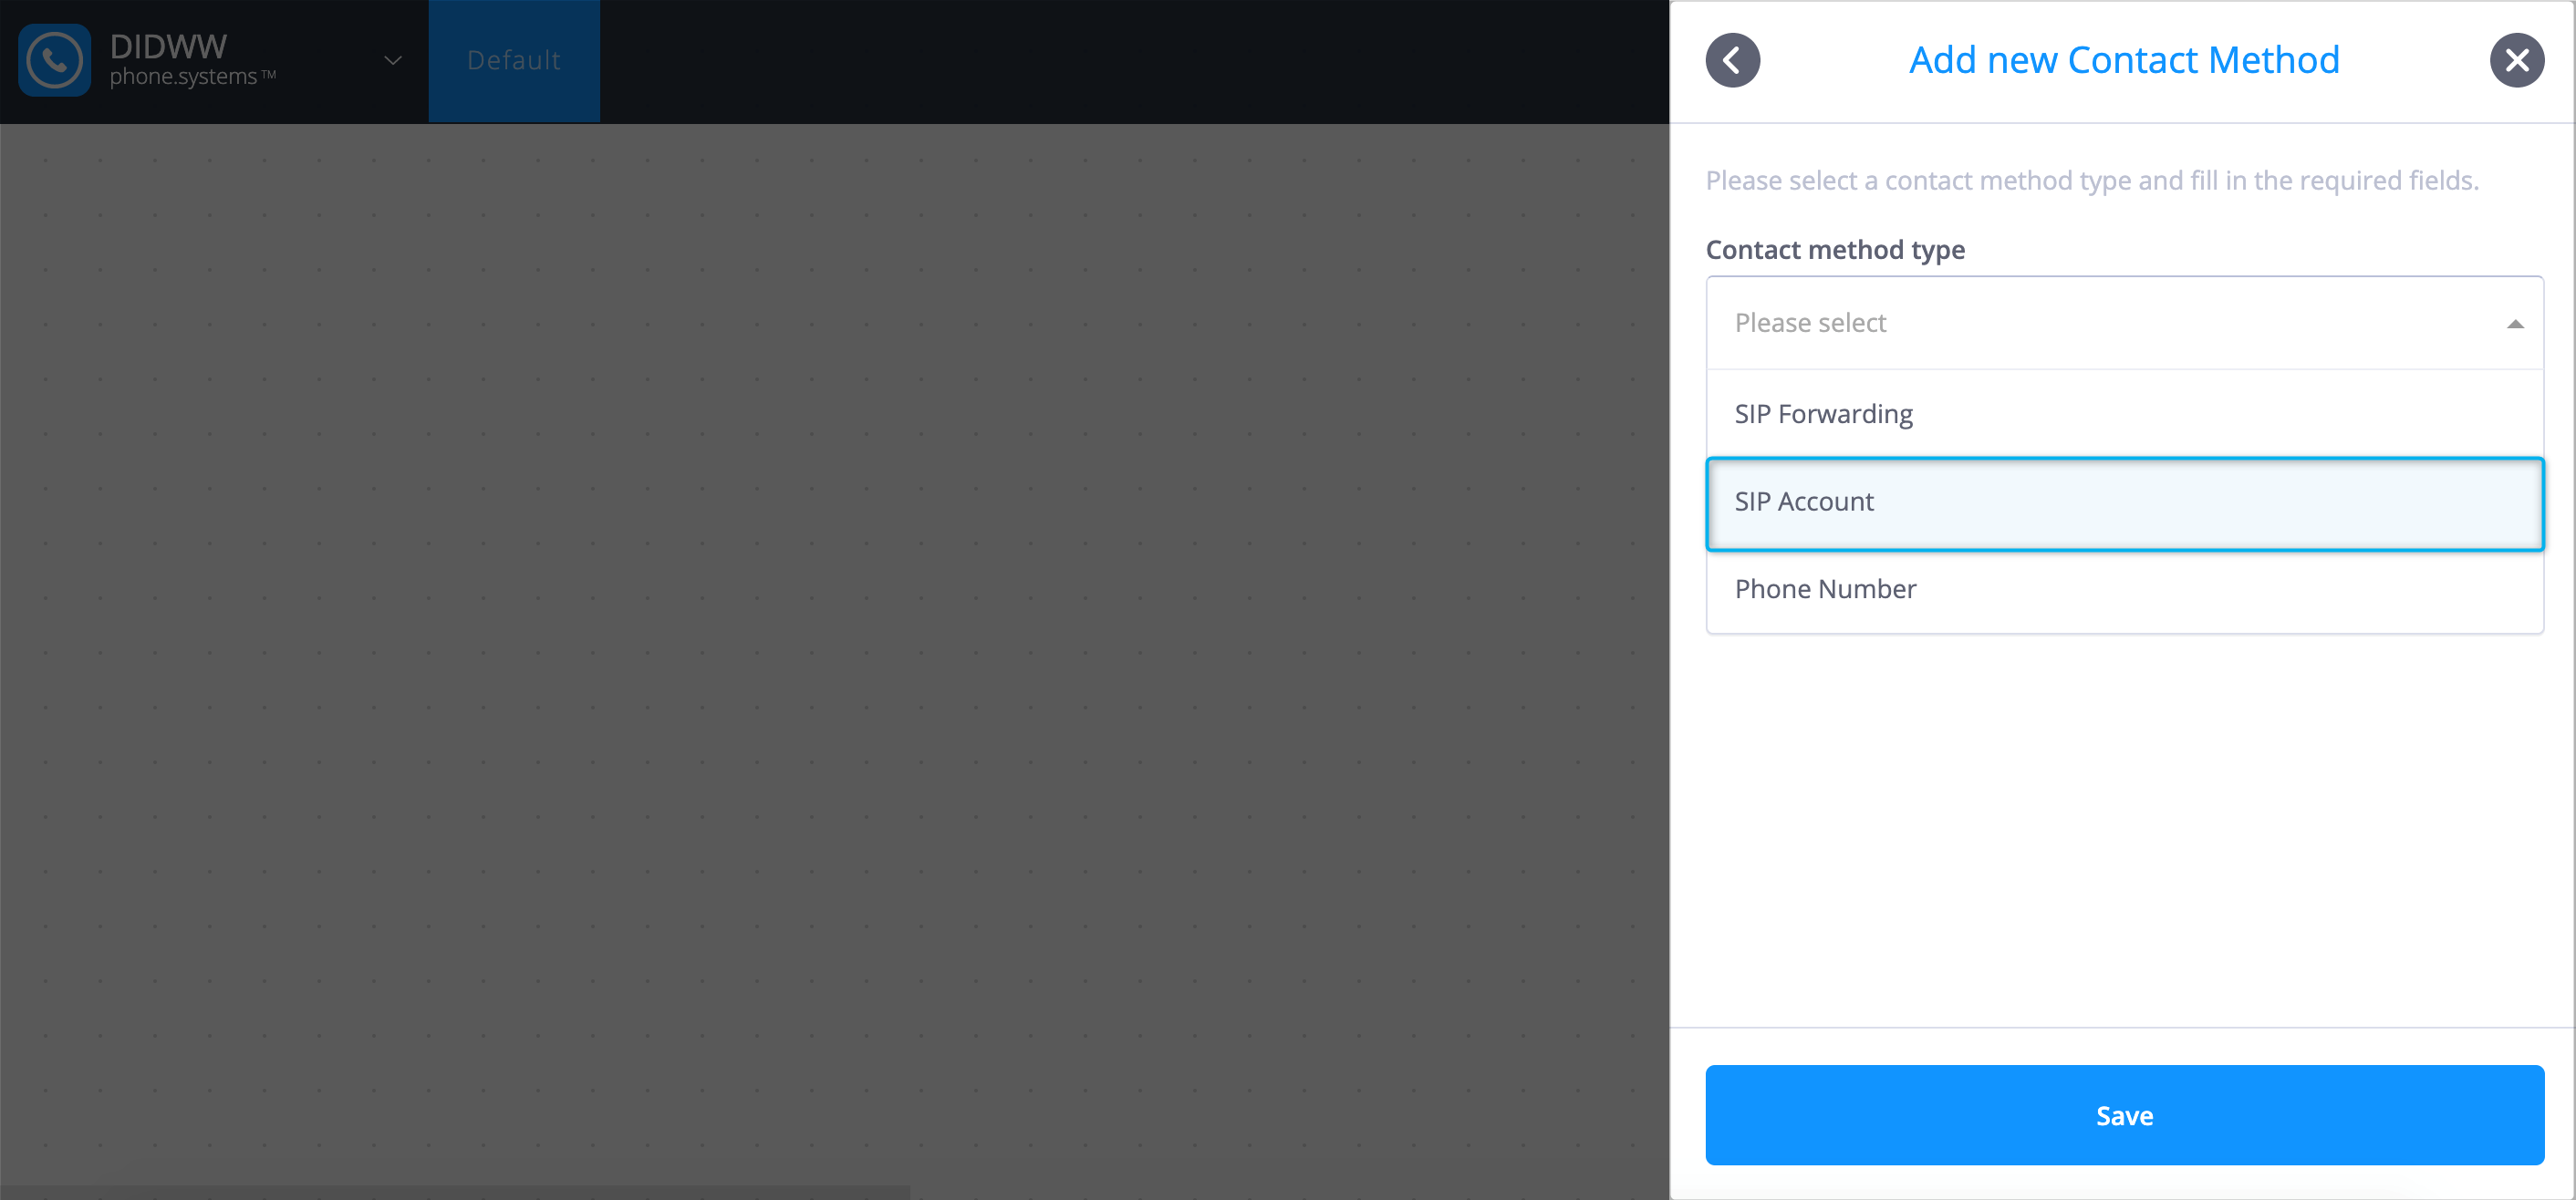 Fig. 6. Adding a new “Contact Method”.
Step 8. From the “Label” dropdown menu, select the “Work” option, tick the “Enable Outbound Calls” box, and select the “External caller ID” from the dropdown menu of phone numbers that were previously added to phone.systems™ (Fig.7).
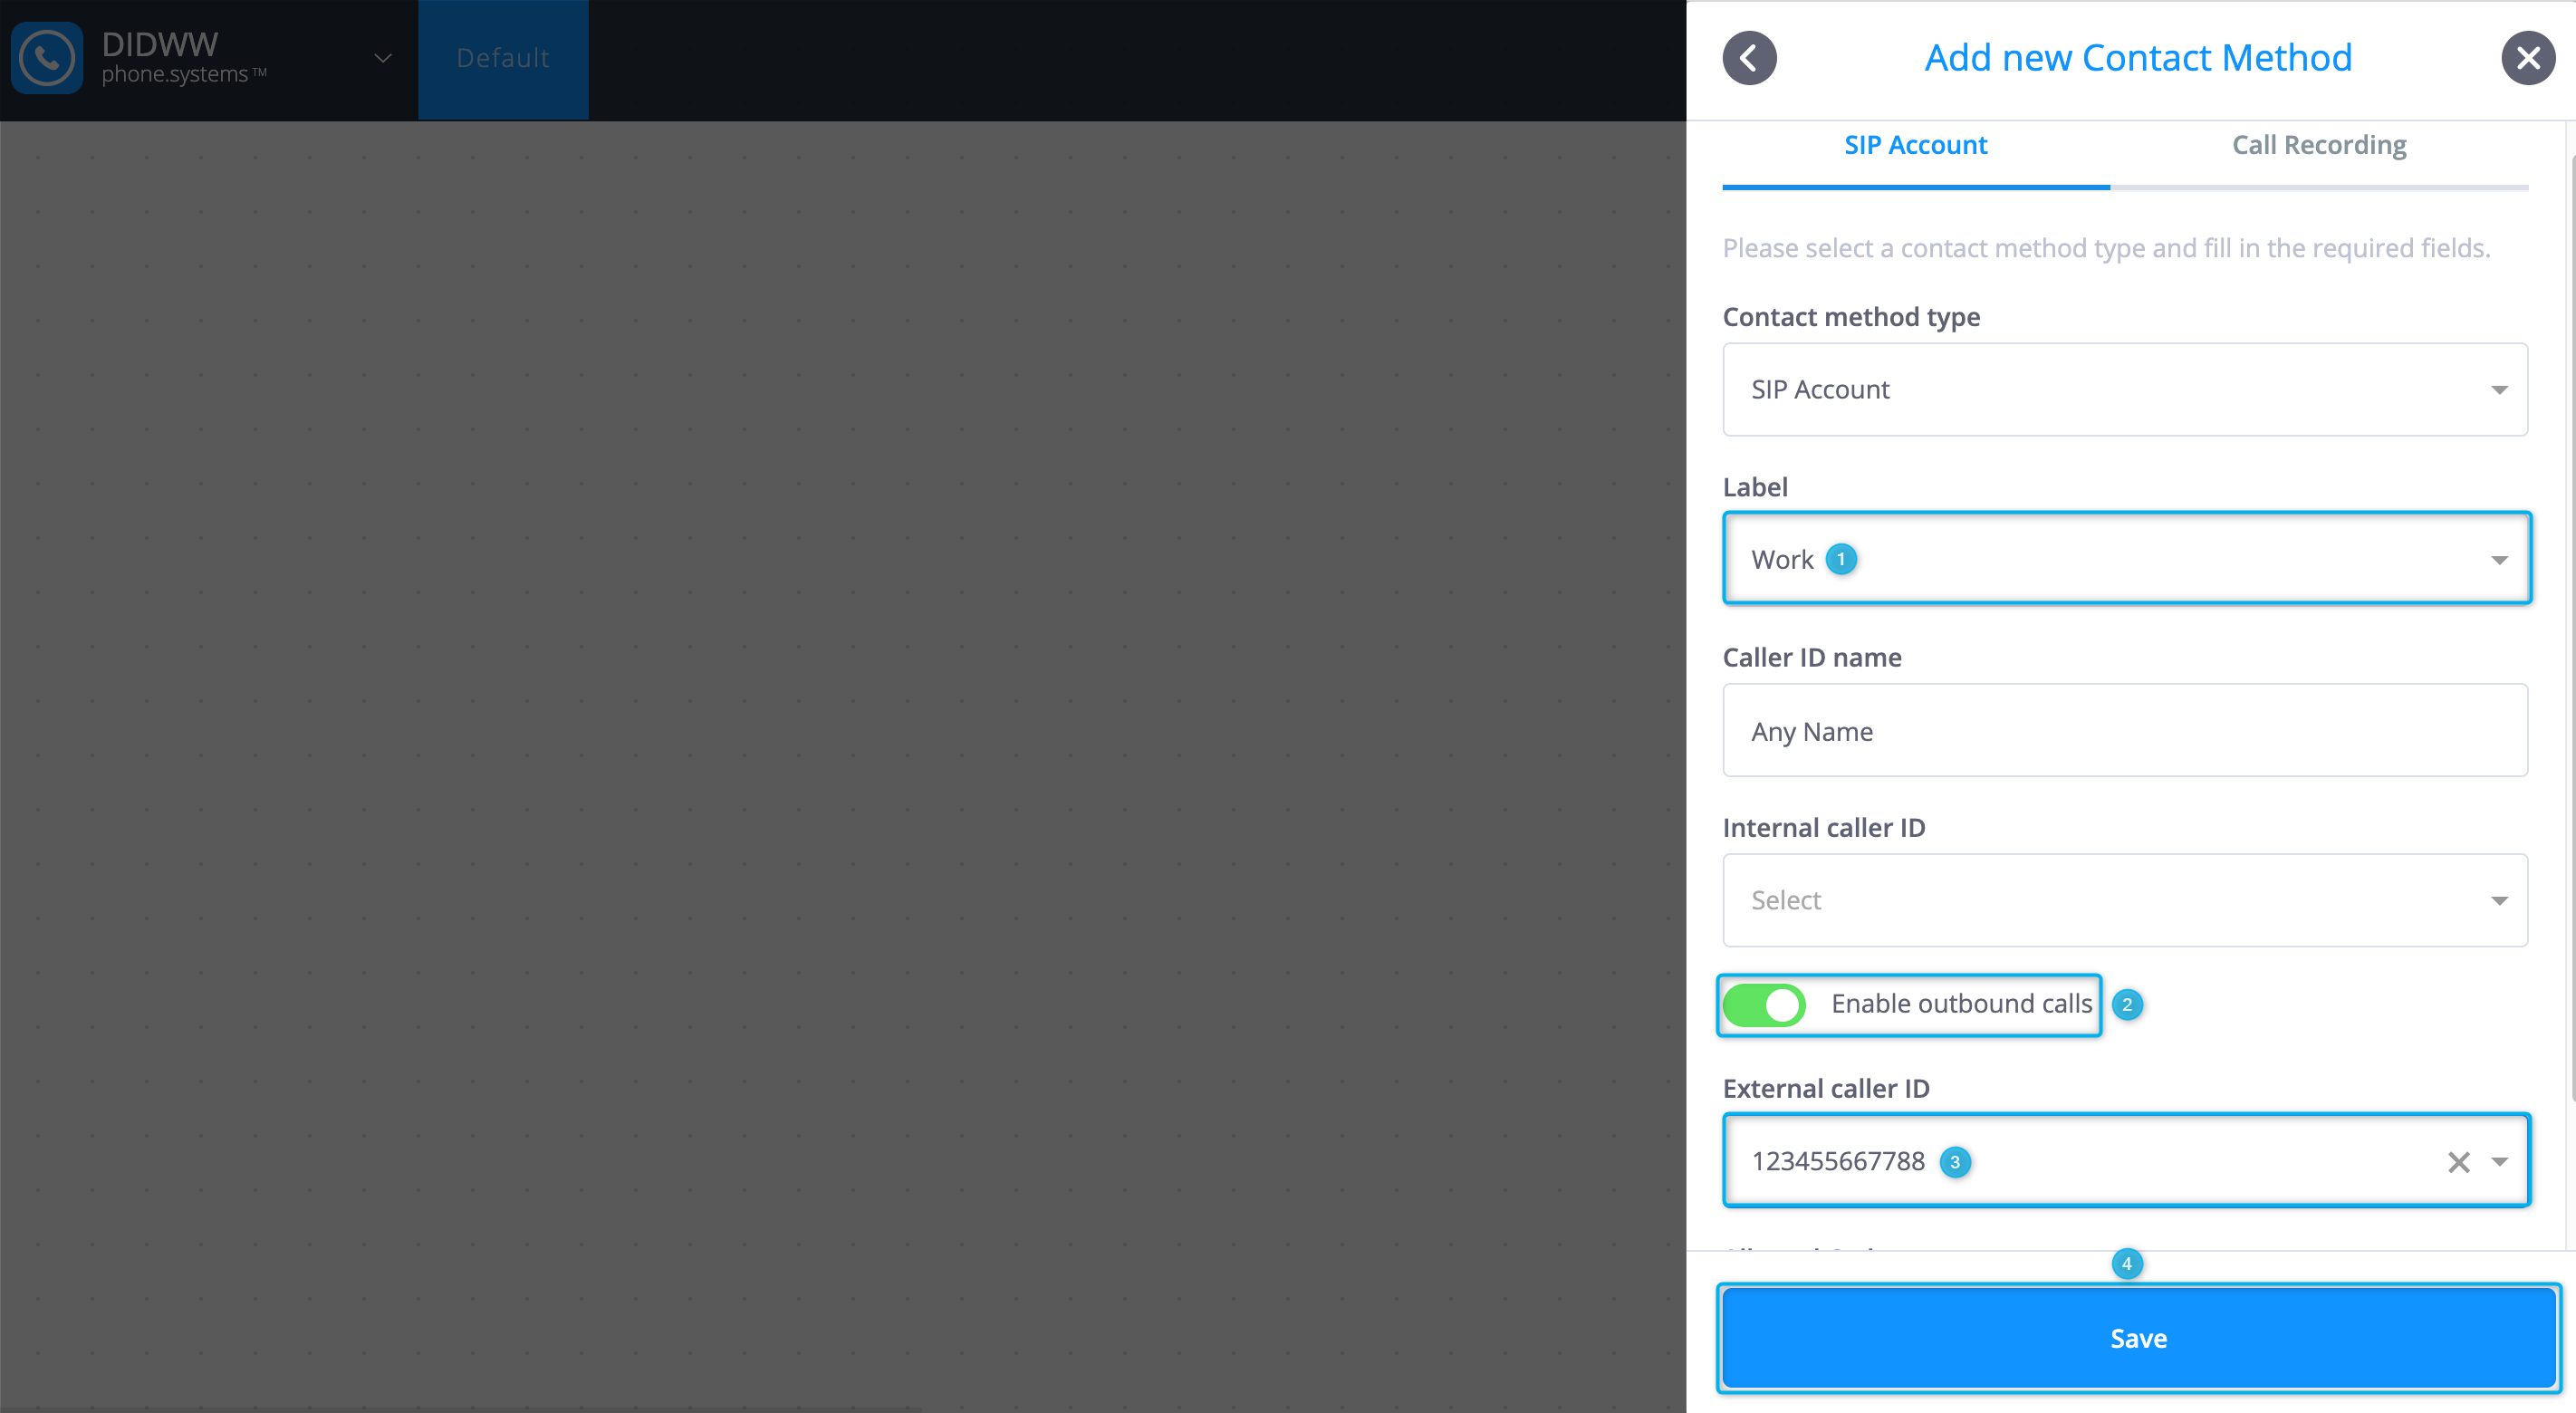 Fig. 7. Creating a “SIP Account”.
Step 9. Press “Save” to create a new “SIP Account”.
Step 10. Click on the arrow next to the SIP details to find the “SIP Account” details to use with your softphone/IP phone (Fig.8).
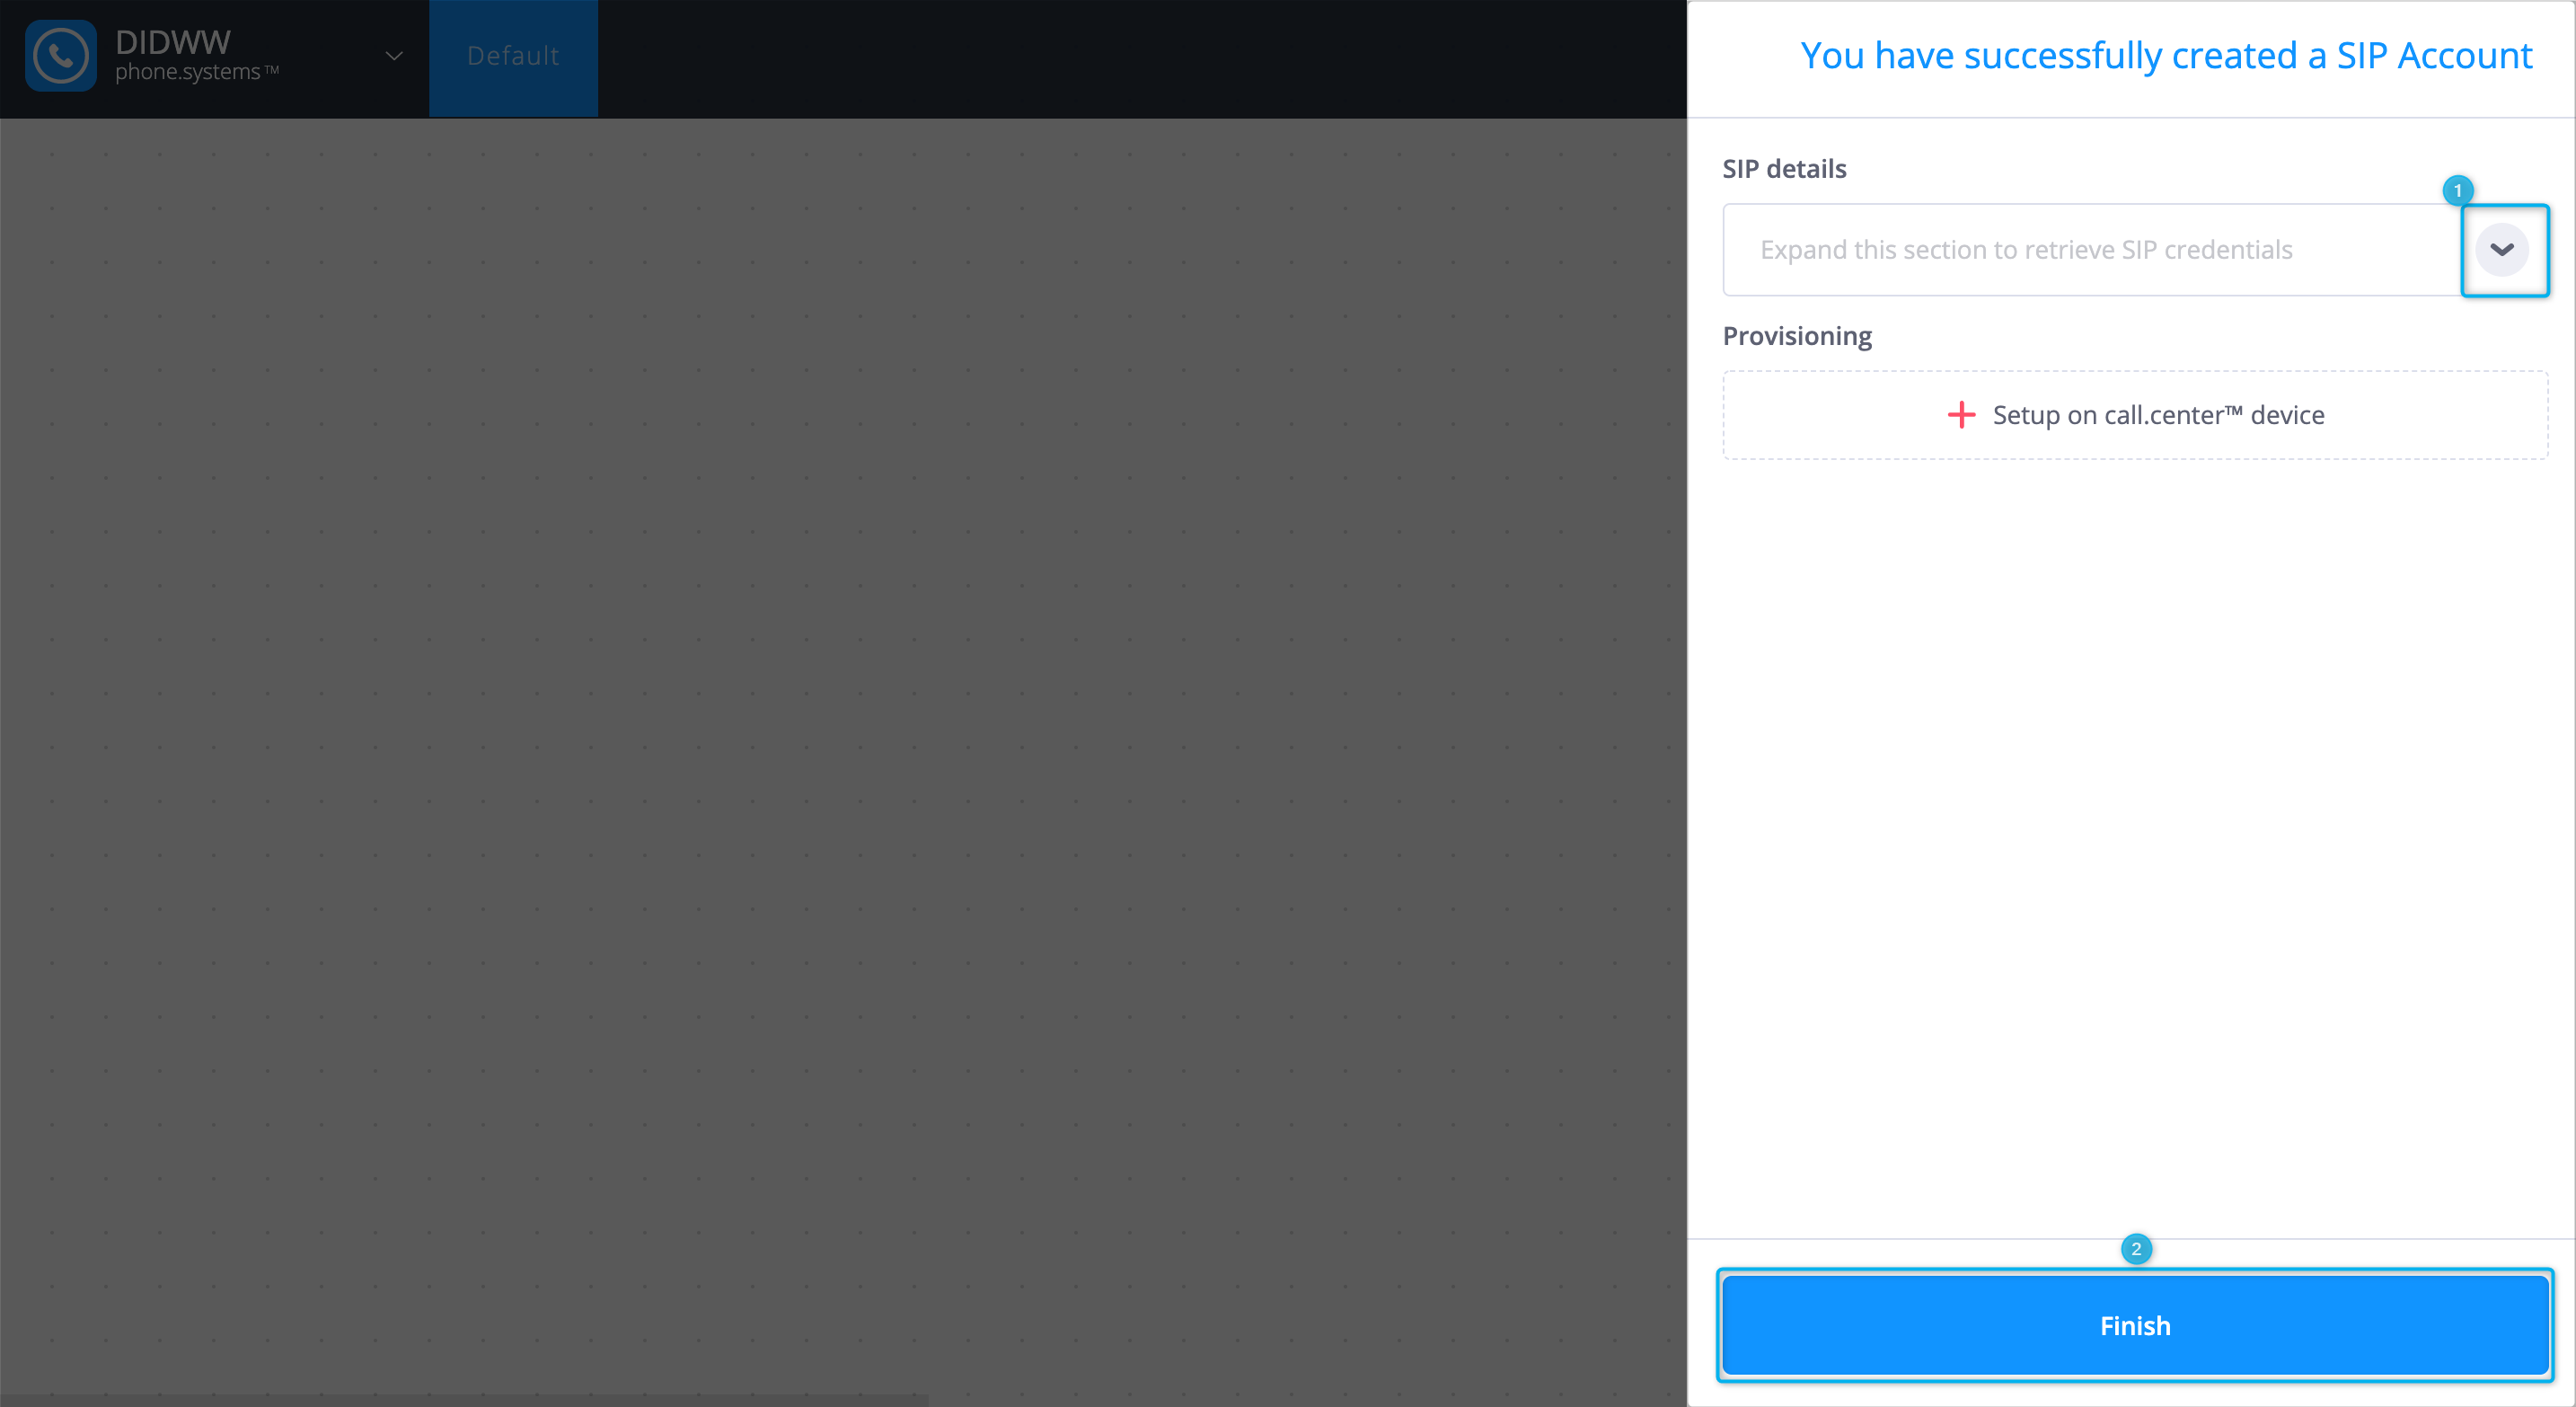 Fig. 8. Reviewing the “SIP Details”.
Step 11. Drag and drop a “Phone Number” object onto the workspace. After selecting your DID number, click “Save” (Fig.9).
 Fig. 9. Adding a “Phone Number” object.
Step 12. Drag and drop a “Ring Group” object onto the workspace. You will be prompted to “Add Ring destination”. Select the newly created “work” SIP account as the ring destination and click “Save”. (Fig.10).
 Fig. 10. Adding “Ring Group” object.
Step 13. Drag a cable between the two newly created objects to connect these objects. (Fig.11).
 Fig. 11. Connecting newly created objects.
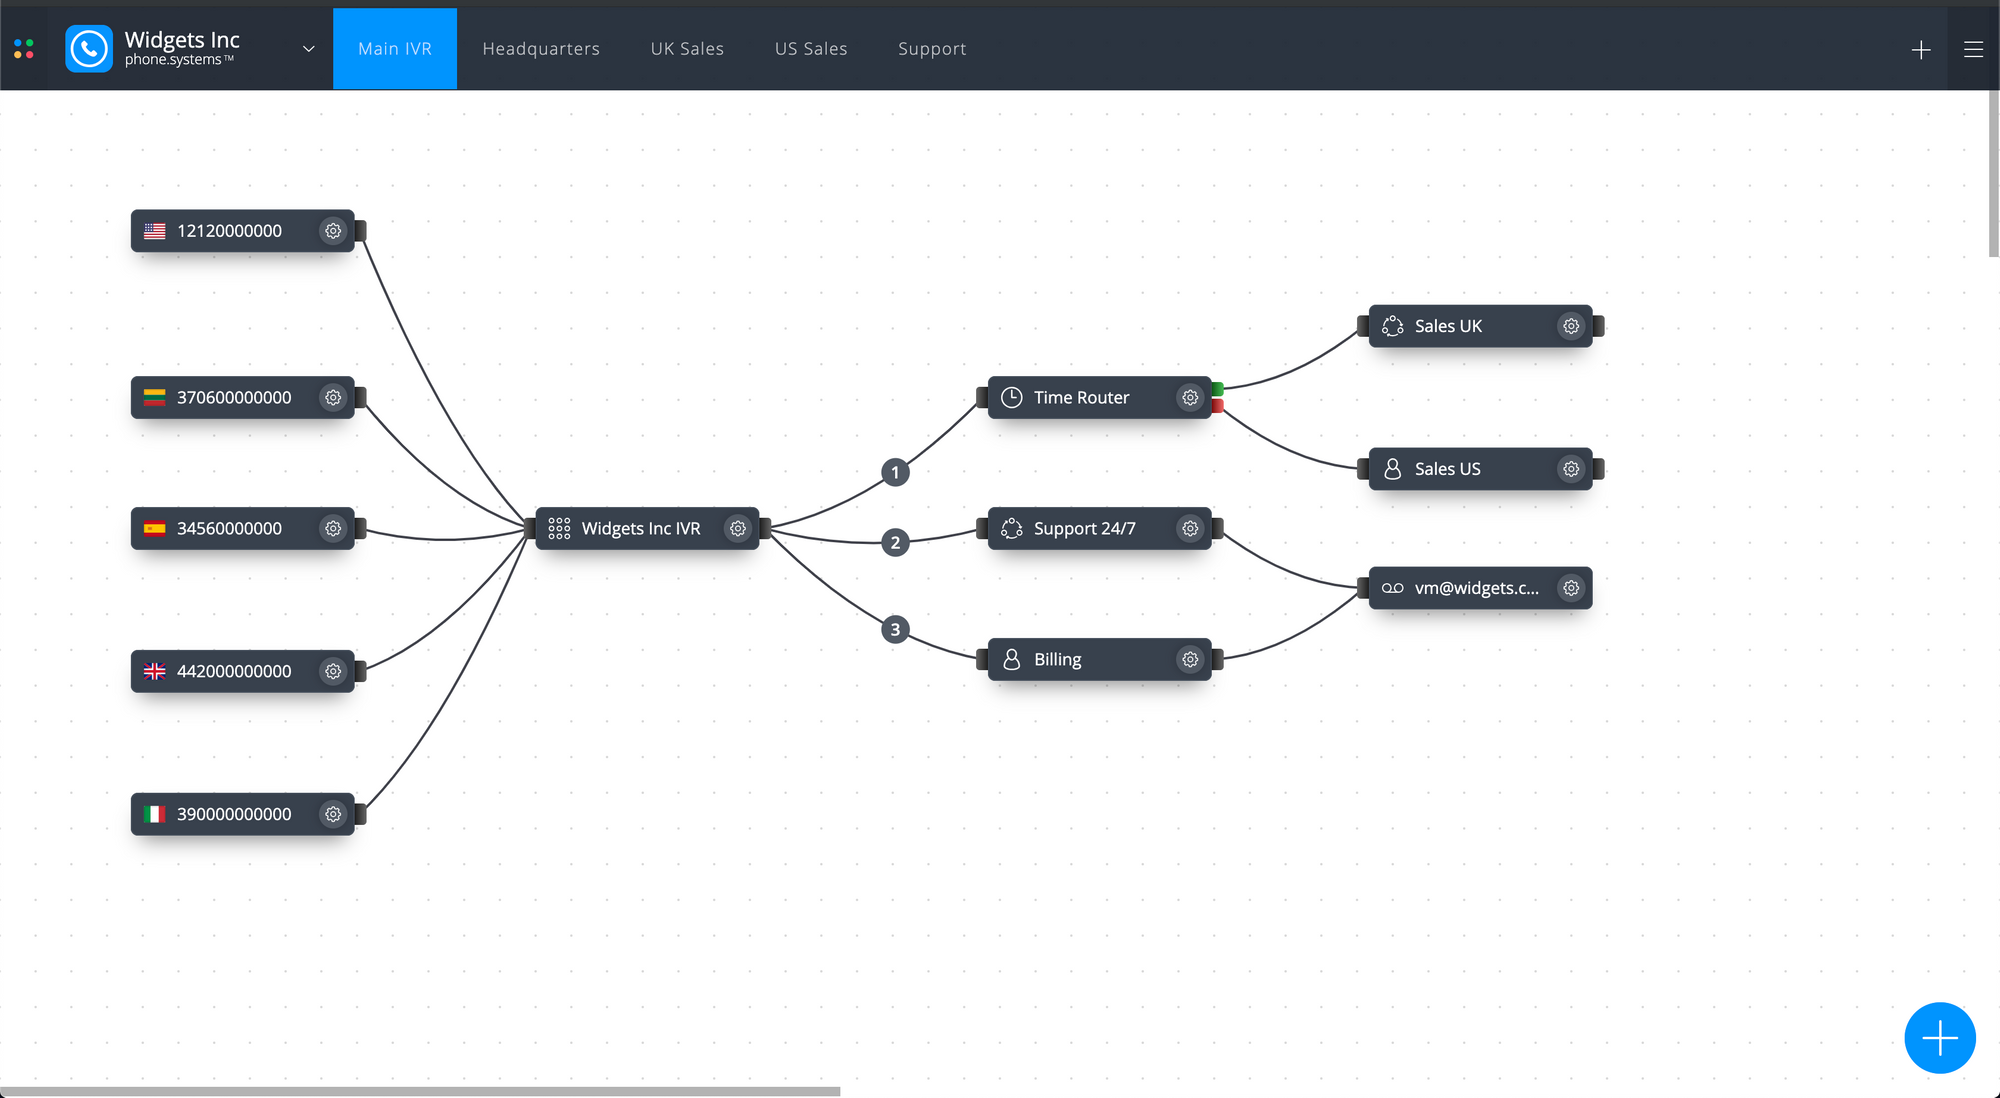
You are now ready to receive and make phone calls using phone.systems™.
phone.systems™ is highly scalable, and may be used for small businesses, all the way through to complex, multi-branch corporate voice systems. For further information, see our video or read the detailed phone.systems™ user guide.
If you have any questions, please feel free to contact us at customer.care@didww.com.